Google updates include added phishing protection and better defense against malware injection attempts. We’ve written this blog to help you assess the options available to you and help you make the most of them.
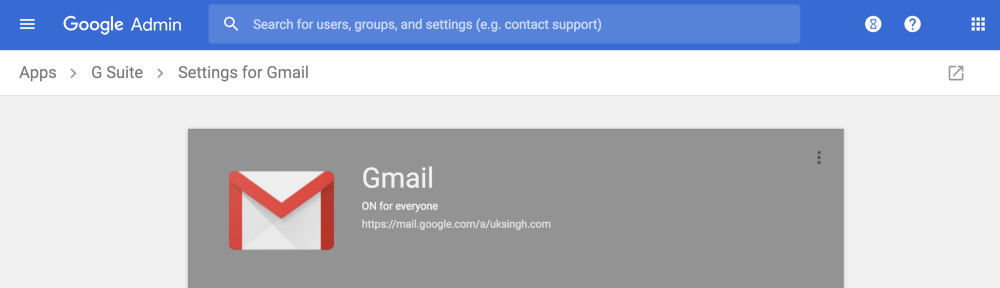
It’s worth noting that if you’re a G Suite customer in Australia, these new features will automatically be enabled within your account, so you may want to ensure you’re happy with the settings. If you’re not located in Australia, you’ll have to go into your settings to enable the new features.
So what are your options?
If you’re one of your organization’s G Suite Admins, you’ll now be able to navigate to a new area within your Admin console called ‘Safety’. The image below shows how to get here. You’ll be able to view these security features at an organizational level so your users will not have to worry about configuring anything.
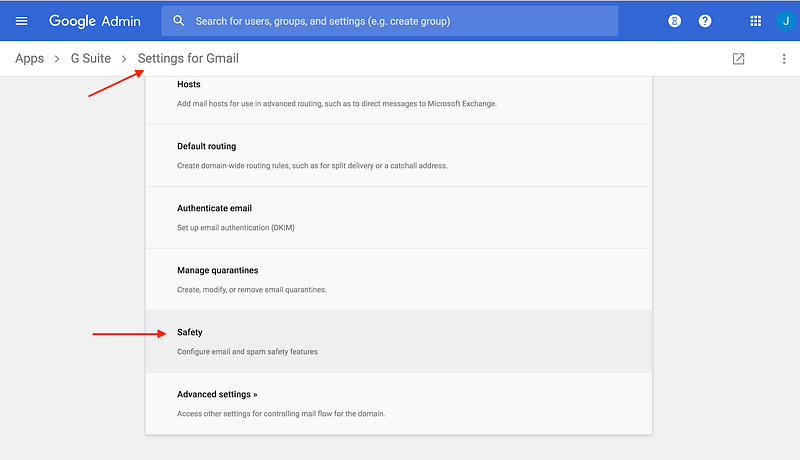
Inside the Safety tab, you’ll have the option to edit three aspects of your email protection. We’ll cover each one and explain how all these changes impact your organization.
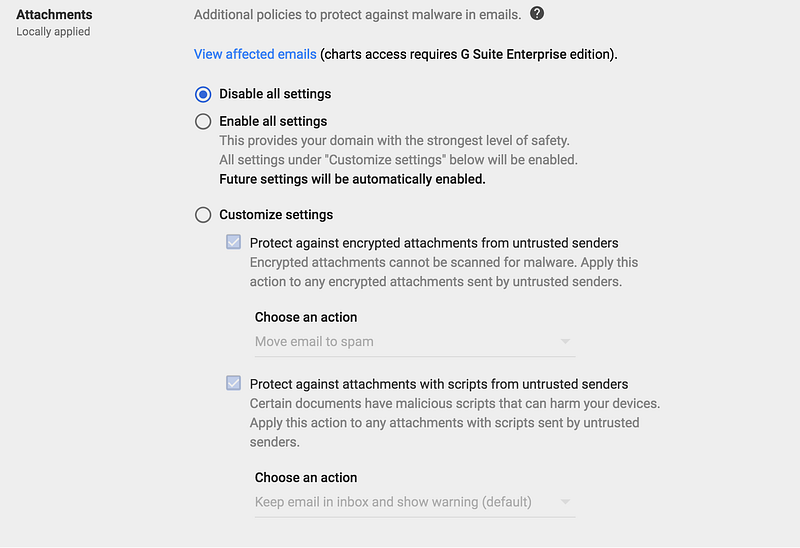
1. Attachments
This option allows you to set policies for email attachments. Google scans email attachments to see if they are encrypted or contain scripts from untrusted senders.
You can choose to enable all settings which will automatically put the strongest level of security into play and send all emails that contain a suspicious attachment into the spam folder. Or you can choose to customize your settings and define whether emails with encrypted attachments and/or emails that contain scripts from untrusted senders should be sent to spam or delivered to the inbox with a warning.
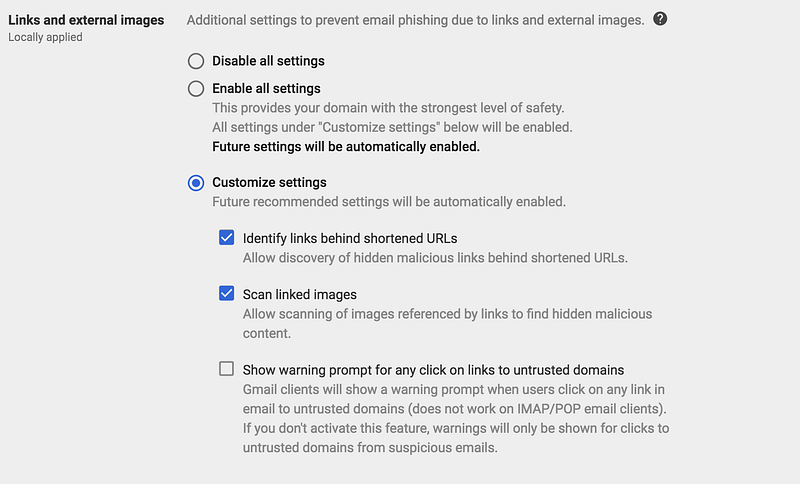
2. Links and external images
The second option is designed to protect your users against malicious links contained in emails. You have the option to:
- identify the full URL of shortened links so your users can establish if the link is valid or not
- scan images for any hidden malicious links
- highlight any links that Google thinks might be malicious
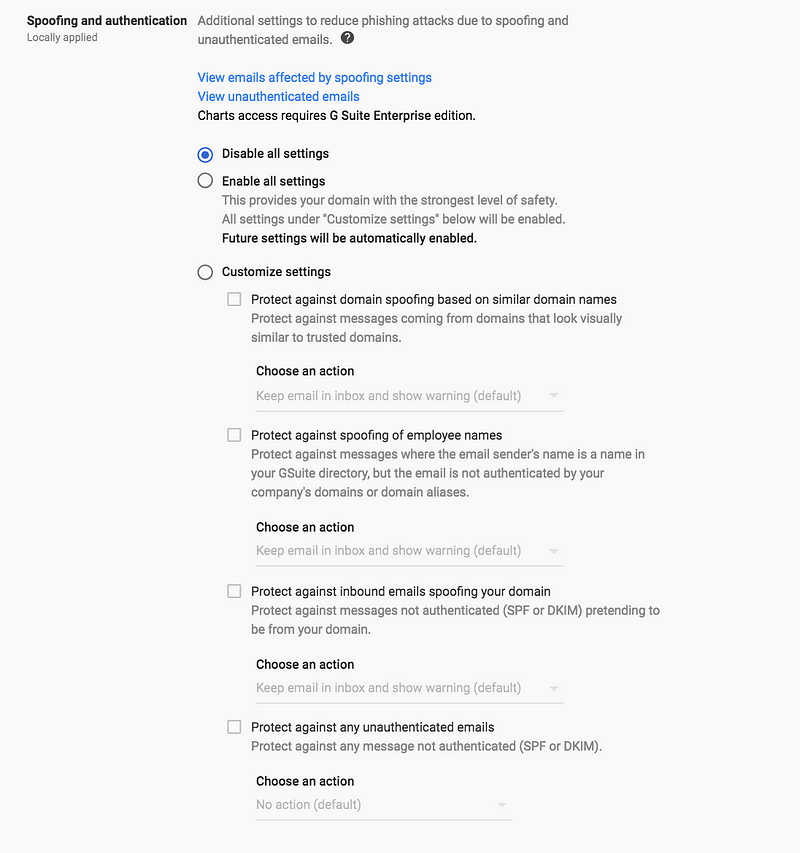
3. Spoofing and authentication
The final section allows you to define how you want to treat emails that fail email authentication and appear to be a spoof. In the customization section, you have 4 fields that you can define actions for:
- Lookalike domain spoofing protection This setting tells Google to send any emails that appear to come from a lookalike domain to either spam or, if you chose, your inbox. For example if you receive an email from app1e.com instead of apple.com, then the email from app1e.com could either end up in spam or have a warning displayed in the inbox (depending on the action you choose).
- Protection against spoofing employee names This setting lets you add a warning to emails, or send emails to spam, that use someone in your organisations name. This means if you get an email from an “Anna Smith” <Ann4.Sm1th@gmail.com> and you have someone called Anna Smith in your organisation, your users will see a warning of this or the email will be sent to spam.
- Inbound protection against emails that fail authentication This allows you to decide what you do with emails that fail SPF and DKIM authentication. This will protect your users from receiving emails from sources that are pretending to be your domain.
- Protection against any unauthenticated emails This is similar to the last option except it not only protects against spoofing attempts from your domain, but also against attempts from other organisations’ domains.
Do you need to do anything else?
Yes! Now that Google is helping its users to actively block unauthenticated emails you need to make sure you in turn are authenticating your own emails with SPF, DKIM, and DMARC at p=reject. If you don’t then your emails will end up in the Gmail spam boxes of your recipients.
This means you’re going to need to authenticate G Suite as well as any other sending sources that you use to send email, this might include marketing software like Mailchimp or CRM software like Salesforce.
In order to make sure your organization’s emails are being properly authenticated, let our award-winning DMARC product OnDMARC do all the heavy lifting for you. The bonus of implementing DMARC will be a drastic improvement in the deliverability of your emails, as well as guaranteed protection of your domain against phishing and spoofing attacks. All of this in return will protect your domain’s reputation.
Why not try OnDMARC for yourself with a 14-day free trial?